If you are interested in Staggered Grid View: Creating Staggered View RecyclerView In Android
  |
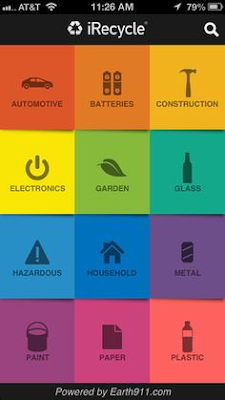
| A possibility of wWhat you can create with Grid Layout manager |
So let’s get started and create a RecyclerView with GridLayoutManager:
- First of all you need to add dependency to use RecyclerView, add this dependency in your app level gradle file:
compile 'com.android.support:recyclerview-v7:25.3.1' - After you’ve added the dependency, you can use recyclerView. Create a new layout, I named it main_activity.xml and add the following code in it:
<?xml version="1.0" encoding="utf-8"?>
<LinearLayout xmlns:android="http://schemas.android.com/apk/res/android"
android:layout_width="match_parent"
android:layout_height="match_parent"
android:gravity="center"
android:orientation="vertical"><android.support.v7.widget.RecyclerView
android:id="@+id/rvMain"
android:layout_width="match_parent"
android:layout_height="wrap_content" />
</LinearLayout> - Now that we have the recyclerView ready, let’s create a view that will be used by the recyclerView, i.e the view that will be visible to the user as a grid in the GridView of the recyclerView. Create a new XML file and call it recycler_item or anything you want, here’s the code:
<LinearLayout xmlns:android="http://schemas.android.com/apk/res/android"
android:layout_width="match_parent"
android:layout_height="wrap_content"
android:gravity="center"
android:padding="16dp"
android:orientation="vertical"><ImageView
android:id="@+id/ivLogo"
android:layout_width="80dp"
android:layout_height="80dp" /><TextView
android:layout_margin="4dp"
android:id="@+id/tvCompany"
android:layout_width="wrap_content"
android:layout_height="wrap_content" /></LinearLayout>
- Now that we have our recyclerView and the grid of the recyclerView ready, we can start referencing it in java, but before all that we first need the data that we want to display in the GridView of our RecyclerView. You can download the project from the link below and find the data in strings.xml and drawable folder. After we have our data ready, create a new Java Class, MainActivity.java and write the following code in it: Note: You will get an error for now
RecyclerView rvMain;@Override
protected void onCreate(@Nullable Bundle savedInstanceState) {
super.onCreate(savedInstanceState);
setContentView(R.layout.activity_main);
rvMain = (RecyclerView) findViewById(R.id.rvMain);
Bitmap[] logos = new Bitmap[12];
logos[0] = BitmapFactory.decodeResource(getResources(), R.drawable.logo_apple);
logos[1] = BitmapFactory.decodeResource(getResources(), R.drawable.logo_fb);
logos[2] = BitmapFactory.decodeResource(getResources(), R.drawable.logo_google);
logos[3] = BitmapFactory.decodeResource(getResources(), R.drawable.logo_insta);
logos[4] = BitmapFactory.decodeResource(getResources(), R.drawable.logo_linkedin);
logos[5] = BitmapFactory.decodeResource(getResources(), R.drawable.logo_microsoft);
logos[6] = BitmapFactory.decodeResource(getResources(), R.drawable.logo_myspace);
logos[7] = BitmapFactory.decodeResource(getResources(), R.drawable.logo_skype);
logos[8] = BitmapFactory.decodeResource(getResources(), R.drawable.logo_snapchat);
logos[9] = BitmapFactory.decodeResource(getResources(), R.drawable.logo_twitter);
logos[10] = BitmapFactory.decodeResource(getResources(), R.drawable.logo_viber);
logos[11] = BitmapFactory.decodeResource(getResources(), R.drawable.logo_whatsapp);
MyAdapter adapter = new MyAdapter(getResources().getStringArray(R.array.company_list), logos);
rvMain.setLayoutManager(new GridLayoutManager(ActivityMain.this, 2));
rvMain.setAdapter(adapter);
} - The error you are getting in 2 of the last 3 lines is because you are using a custom adapter class but you have not created it yet. The adapter uses a view holder (I explain this in detail in the video) So let’s first create a viewHolder class first, create a new class called MyViewHolder and write the following code:
public class MyViewHolder extends RecyclerView.ViewHolder{public ImageView logo;
public TextView name;public MyViewHolder(View itemView) {
super(itemView);
logo = (ImageView)itemView.findViewById(R.id.ivLogo);
name = (TextView)itemView.findViewById(R.id.tvCompany);
}
} - Now we have everything ready, all we need to do is create an Adapter class for our recyclerView. Create a new class called MyAdapter and write the following code in it:
public class MyAdapter extends RecyclerView.Adapter<MyViewHolder> {String[] companyList;
Bitmap[] logoList;public MyAdapter(String[] companyList, Bitmap[] logoList) {
this.companyList = companyList;
this.logoList = logoList;
}@Override
public MyViewHolder onCreateViewHolder(ViewGroup parent, int viewType) {
View v = LayoutInflater.from(parent.getContext()).inflate(R.layout.recycler_item, parent, false);
MyViewHolder viewHolder = new MyViewHolder(v);
return viewHolder;
}@Override
public void onBindViewHolder(MyViewHolder holder, final int position) {
holder.logo.setImageBitmap(logoList[position]);
holder.logo.setOnClickListener(new View.OnClickListener() {
@Override
public void onClick(View v) {
Toast.makeText(ActivityMain.this, "This is: " + companyList[position], Toast.LENGTH_SHORT).show();
}
});
holder.name.setText(companyList[position]);
}@Override
public int getItemCount() {
return companyList.length;
}
}
Now we have our RecylerView Ready. You can now run the project and see the results, you will see a gridView like list in the recyclerView. again I recommend going through this video for learning some essential things about recyclerView. That’s it for now, if you have any more questions regarding RecyclerView or GridLayoutManager feel free to drop them in the comments section below. Happy Coding! 🙂
SOURCE CODE DOWNLOAD LINK – RecylerView with GridLayout Manager

jlkjlkjl;sdfdsfs
fsflksajdflskjflskjklj;fsfddsfd
dsfsdfasfs
saasfsdfdssfdfa