Welcome fellow Android enthusiast, in this post we’ll be discussing ADB (Android Debug Bridge). According to Google: “Android Debug Bridge (adb) is a versatile command-line tool that lets you communicate with a device.” There are a lot of reasons why you might need to communicate with your Android device via your computer. You might have broken something and need to fix it, quick installations, un-installations, debugging and much more. So let’s dive into it.
Pre-requisites to run ADB Commands:
1. Android platform-tools in your computer.
2. Android Device with USB Debugging enabled.
First of all, before being able to run ADB Commands, we need to download Android’s platform-tools. If you are an Android developer you must already have this set up, if not, you’re probably not an Android developer :D. Go to Platform-Tools, and download platform tools that corresponds to your device. After the download is complete, move the zip file to the location of your choice and unzip it. For this tutorial, let’s assume that I’ve unzipped the platform-tools in C:/Users/Vysh/platform-tools. Now we are ready to use ADB Commands.
Note: For running the ADB commands, you must be inside the platform-tools in command promt or which ever terminal you’re using. We’ll later put ADB directory in environment variable and we will be able to run ADB commands from anywhere.
Now we have to enable USB debugging in our Android’s Device System setting, under developer Options. If you don’t see any such option, go to Settings -> About phone -> and tap Build number 7 times and see the magic! Now you should be able to see developer options. Go ahead and enable USB Debugging.
Once you are a “Developer”, you can start using these commands if you have connected only one device or if you have multiple devices connected, you will need to use the -d, -e, or -soptions to specify the target device for which the command needs to be used. Now open Command Prompt or a terminal of your choice and go into the platform-tools directory, using cd path/to/platform-tools. In this post’s case C:/Users/Vysh/platform-tools. Now we are ready to enter some ADB Commands:
Keep in mind that this is not a complete list of Android Debug Bridge (ADB) commands but a list of basic and necessary commands that I think an Android user should know in order to exploit his/her Android device fully.
Let this list refresh your memory or teach you some new stuff to delve into the Android world.
Basic Android debug bridge(ADB) commands:
1. adb devices
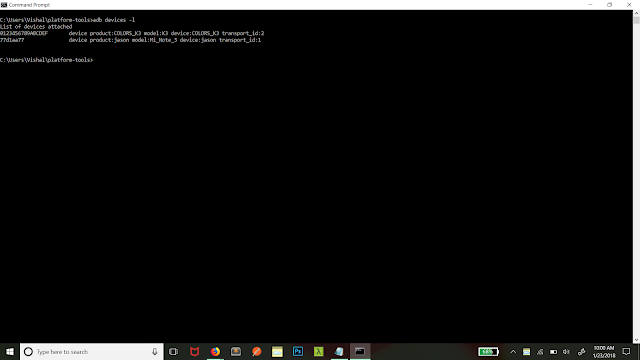
Using this command, you can check the of all the attached emulators or device instances.
Command : adb devices -l
  |
| adb devices |
Enter the command you should be able to see a list of devices connected to your computer. The text that you see in the first column is device id that uniquely identifies a device. It is very important as it allows us to direct our commands to a specific device when multiple devices are connected as we will see later.
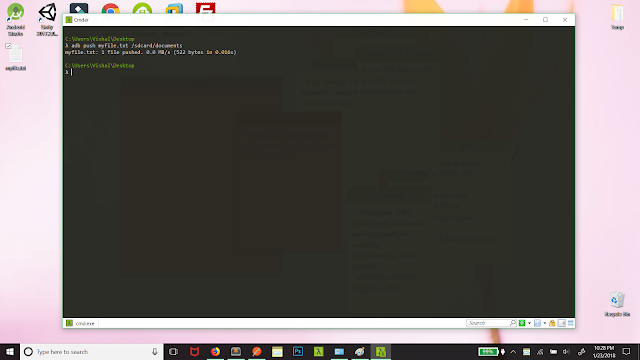
2. adb push
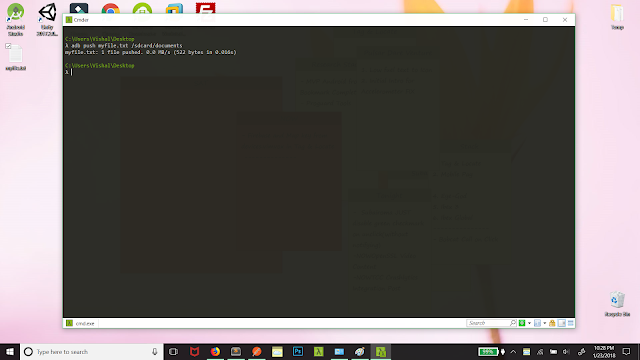
You can use this command to copy a specified file from you computer to the selected device.
Command: adb push /path/to/file.extension /path/in/your/android/device
  |
| adb push |
Generally the path is inside your sdcard, so we can use it like:
adb push C:/Users/Name/Desktop/myfile.txt /sdcard/documents/ and your file myfile.txt will be copied inside your documents folder in the sdcard of your phone.
3. adb pull
This command copies a specified file from the chosen device instance to your computer. This is very similar to the command that we’ve done before.
Command: adb pull /path/in/android/device/file.extension /path/in/your/computer
  |
| adb pull |
Let’s say we need to copy back the file that we just copied to our android device in step 2 back to our computer. We would do:
adb pull /sdcard/documents/ C:/Users/Name/Documents/myfile.txt and your file myfile.txt will be copied in documents folder in you computer.
4. adb reboot
This command simply reboots your device. No need to long press the power button or any other way you reboot your device directly from phone.
Command: adb reboot
5. adb install
This command will start a remote shell in the target emulator or device instance. Android provides a Unix shell to access the operating system’s services. You can install APKs in your device using this command.
Command: adb install /path/to/name.apk
Let’s say you have small-game.apk in your Desktop, to install it you’ll do:
adb install C:/Users/Name/Desktop/small-game.apk. Now the small-game should be installed in your device.
6. adb uninstall
As the name suggests, this command is used to uninstall an Android application from an emulator/device. You need to know the package name of the application and you need to uninstall, if you don’t know the full application package name, we will see how we can find out the package name of the application in the next command.
Command: adb uninstall com.package.appname
For example, let’s uninstall the small game that we had installed using the install command before this. We would do adb uninstall com.example.small-game.apk, assuming the package name is com.example.small-game.apk.
7. adb shell
This command is a very useful one as it starts a remote interactive shell in the target device. In simple terms, it is more like using the device itself rather than issuing commands to device through a terminal.
Command: adb shell
  |
| adb shell |
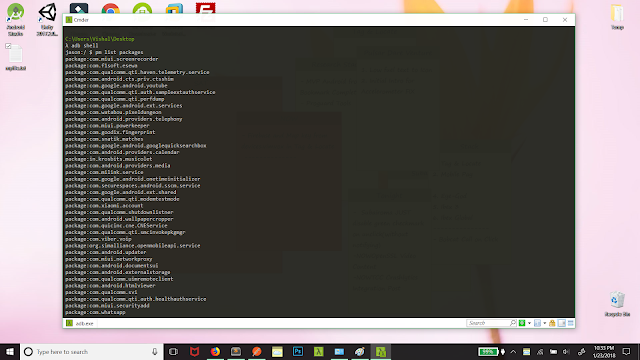
There are a lot of commands that you can use in shell. If you are familier with Linux, you’ll feel like home as Android uses linux kernal. Let’s go over some shell commands. If you want to get the list of package name of all the applications installed, you simply do: pm list packages when you are in shell, i.e you’ve entered adb shell command before this.
  |
| pm list packages |
You can also do adb shell pm list packages but this command will keep you out of the shell. Some other shell commands are:
ps: Displays a list of currently running processes.
am start -n app.package.name/main.activity.path: To start and app.
am force-stop app.package.name: To force stop and app.
There are a lot of other shell commands, you can go over them here: ADB Shell Commands.
8. adb logcat
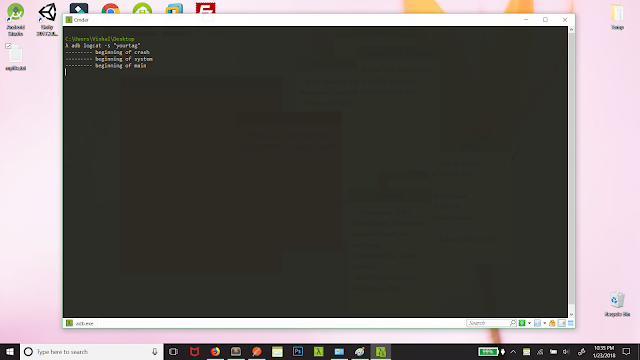
This command lets you see log messages from all the applications in you Android devices. It will seem like a bunch of gibberish unless you know the meaning of the logs.
Command: adb logcat
  |
| adb logcat |
The command in itself produces a lot of data that will be difficult to process, so you can use filters to receive log messages from a specific app or tag. For example:
adb logcat -s “mylog”: Show log messages with tag mylog
You can learn more about logcat filers here: Logcat Filters.
9. adb help
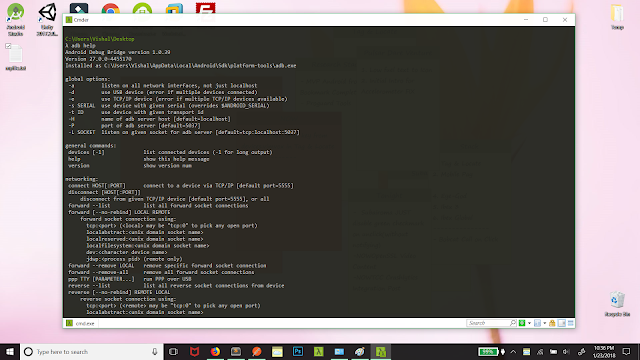
Finally, If you are lost in the sea of commands, the help command is here to help you. This command prints a list of supported adb commands that you can use.
Command: adb help
  |
| adb help |
This will list out all the available commands that you can use with adb.
10. reboot commands
These commands are very helpful when you need to perform functions like flashing a new rom, formatting your device, or fixing something that you broke and more.
Command: adb reboot recovery
If you want to flash a ROM you will need to boot into recovery. This command will switch off your phone and directly reboot into recovery. You can perform functions like flashing ROMs in recovery mode. Normally, you need to hold down a particular set of buttons on your phone for a certain length of time, to get into recovery mode. This command directly boots you into recovery mode without knowing the buttons you need to press.
Command: adb reboot-bootloader
This usually applies to devices where you have the bootloader functionality. This command reboots your device into bootloader mode. In bootloader mode, you can unlock your bootloader, reboot into fastboot and recovery mode, and do a few other tasks.
Command: adb reboot fastboot
Fastboot is necessary as normal ADB commands don’t work when you’re in bootloader .This command will directly take your device to fastboot mode instead of going into bootloader first.
In this mode you can flash custom recoveries as well as custom ROMs.When you are in bootloader, you can do fastboot devices, this will check list of devices connected similar to ADB Devices, the difference basically being this works in bootloader mode.
Issuing ADB Commands when Multiple Devices are Connected:
Let’s assume you have more then one device connected to your computer. In that case you won’t be able to run the commands above unless you define in which device you need to run the command. You’ll get an error: more than one device/emulator. In order to run ADB commands now, you need to know the serial number/device id that we had discussed earlier in this post. To find out the serial number of the device you’re interested in, just enter adb devices -l and copy the serial that corresponds to you devices and run commands like this:
adb -s yourserialnumber install yourapp.apk
That’s it, just enter -s and then the serial number of device you want to run that command on and everything else is the same!
Issuing ADB Commands from anywhere
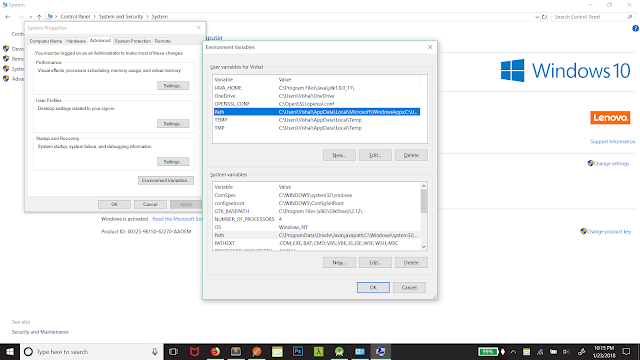
To use adb commands from any directly not just the platform-tools directory we need to add the platform-tools directory to the “path” environment variable. To do that first of all open control panel. Now click on System and Security. Now Click on System. Now on the left hand side, you’ll see advanced system settings, click on that. Now click environment variable. You’ll see two sections similar to the image below.
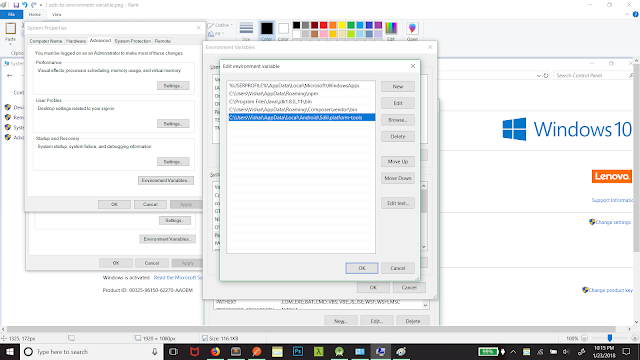
The top section is User variable and the bottom one is System variable. You’ll see a row with variable name path in both the sections. If you add the path to your platform-tools in User variable, it’ll only be accessible to current user, and if you add it to system variable it’ll be available to any user that logs in to your computer. Now select the path variable of your choice and the click on edit. Now click on new and enter the full inclusive path of your platform-tools directory.
Now click ok in the dialogs and you are done, you might need to restart your computer if you are still not able to run adb commands from any directory.
These were some basic commands that I thought an Android user that often connects the device to PC should know. Try it out now, and explore you device. As usual let you thoughts fly in the comments section. Cheers!


