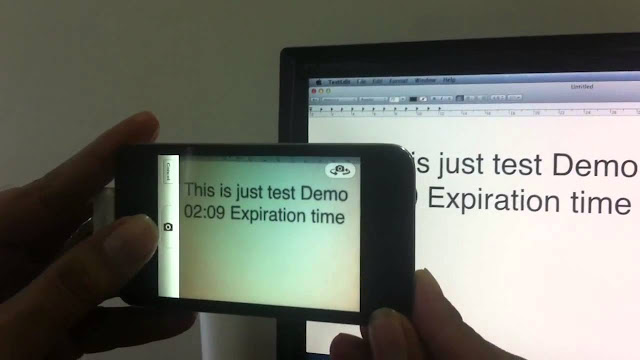
Text Detection using electronic devices link an Android device using an app is also called optical character recognition (OCR). Since it’s inception OCR has come a long way in terms of speed and ease of use, but we still cannot detect handwritten text and accuracy of OCR depends on various factors.
Text recognition in Android has become relatively easier. There are various library that allows you to perform OCR using and Android app. Some like Abby, are commercial text recognition solutions while others like Tesseract are free and open source, hence tesseract is the most common Text recognition library for Android. If you want to detect text regions and not read it, you can refer to my post here – Text detection in Android using openCV.
In this post we will learn –
How to create Android app that performs OCR in Android Studio using Tesseract library :
There are various approaches to do this but this is the most simple and quick approach –
1. Adding tess-two to dependency
2. Creating a class to manage Tesseract calls.
3. Initialize the object of the class and call methods on that object.
We will be using tess-two library for using Tesseract in Android. To use tess-two with Android Studio, just add the following to dependencies of app module-
compile 'com.rmtheis:tess-two:6.0.3'
Now sync the project and you will be able to use Tesseract with Android Studio. So out first step is complete, now let’s move on to the next step. We will create a class that will handle the initialization of TessBaseAPI and contain methods to facilitate call to recognize text from images. Here is the code for the class :
public class MyTessOCR {
    private String datapath;
    private TessBaseAPI mTess;    Context context;
    public MyTessOCR(Context context) {
        // TODO Auto-generated constructor stub
    this.context = context;
        datapath = Environment.getExternalStorageDirectory() + "/ocrctz/";
    File dir = new File(datapath + "/tessdata/");
    File file = new File(datapath + "/tessdata/" + "eng.traineddata");
    if (!file.exists()) {
            Log.d("mylog", "in file doesn't exist");
        dir.mkdirs();
        copyFile(context);
    }
mTess = new TessBaseAPI();
String language = "eng";
mTess.init(datapath, language);
//Auto only
mTess.setPageSegMode(TessBaseAPI.PageSegMode.PSM_AUTO_ONLY);
}
public void stopRecognition() {
mTess.stop();
}
public String getOCRResult(Bitmap bitmap) {
mTess.setImage(bitmap);
String result = mTess.getUTF8Text();
return result;
}
public void onDestroy() {
if (mTess != null)
mTess.end();
}
private void copyFile(Context context) {
AssetManager assetManager = context.getAssets();
try {
InputStream in = assetManager.open("eng.traineddata");
OutputStream out = new FileOutputStream(datapath + "/tessdata/" + "eng.traineddata"); byte[] buffer = new byte[1024];
int read = in.read(buffer);
while (read != -1) {
out.write(buffer, 0, read);
read = in.read(buffer);
}
} catch (Exception e) {
Log.d("mylog", "couldn't copy with the following error : "+e.toString());
}
}
}
Remember to keep the traineddata file for the language that you need tesseract to recognize in the assets folder. For this example we have eng.traineddata.
Now only the final step remains to build our Android app for OCR. Now we just need to use this class and call required methods for recognition.
In the Activity in which you need to recognition, just Initialize an object of this class :
private MyTessOCR mTessOCR;
mTessOCR = new TessOCR(MainActivity.this);
Once initialized you can just call the following method and pass a bitmap as a parameter, your android app should read the text from the bitmap and return you a string now :
String temp = mTessOCR.getOCRResult(bitmap);
Temp now contains the string value of the text that is read from the bitmap that you passed as an argument in the code above! Congratulations, now you are ready to build your first OCR app for Android. If you want to learn how to recognize text region, and want an example for this code check out the following :
Text Region Detection using OpenCV.
Text Recognition app in Android Example.
Keep Coding, do comment you problems if you have any problems.


mTessOCR = new TessOCR(MainActivity.this);
error at this line
What's the error?
Sir where i can download tesseract library?
For this project you can just use this dependency in the app level gradle file: compile 'com.rmtheis:tess-two:6.3.0' and sync the project. If you want the openCV you can download it here: https://sourceforge.net/projects/opencvlibrary/files/opencv-android/3.1.0/OpenCV-3.1.0-android-sdk.zip/download and import it as a module dependency.
TessOcr can't be resolved.
Hello, I'm trying to use it for Bulgarian language.
I do the following:
1. Replace language code from 'eng' to 'bul'
2. Use bul.tranineddata file instead of eng.traneddata file. (I downloaded bul.traineddata from https://github.com/tesseract-ocr/tessdata
But mTess.init(datapath, language); fails with:
E/Tesseract(native): Could not initialize Tesseract API with language=bul!
Maybe I'm missing some step or this is wrong lang code?
Thank you for sharing such a useful article. I had a great time. This article was fantastic to read. Continue to publish more articles on
Data Engineering Services
Data Analytics Solutions
Data Modernization Solutions
AI & ML Service Provider