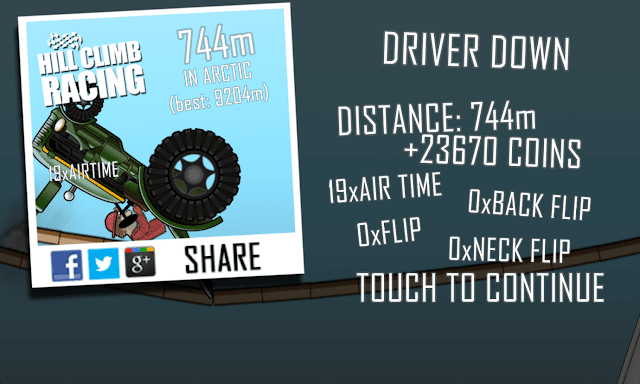
In this post we will share the screenshot that we took using Unity’s Application.CaptureScreenshot() Method 1. If you haven’t check it out here’s the post: Take Screenshot and Display using Unity.
In part 1 we took the screenshot using Unity and saved it in the local storage of the device. Now we will get that screenshot and send it to all the available apps like Facebook, Twitter, Instagram in your Android phone. Let’s start the screenshot sharing process.
  |
| Share screenshot image of Hill Climb |
Share screenshot to Social Media – Android Game
First of all we will start sharing once a share button is pressed. We are assuming you have a share button. Here it the function that will be called when you click on the share button. The isProcessing variable is a bool and it check if user has already pressed the share button and the screenshot is being shared now, if not then starts to share the screenshot. The startCoroutine(ShareScreenshot()) is the method doing all the work. StartCoroutine executes the method provided as parameter is a different thread. ShareScreenshot() function has the code to share the screenshot in Android.
On Share Button Press
public void ShareBtnPress()
    {
        if (!isProcessing)
        {
            StartCoroutine(ShareScreenshot());
        }
    }
Now, this is the main part. Here we have used AndroidJavaClass and AndroidJavaObject that can be initialized with the name of the class in Android along with its package. Check out the code below:
IEnumerator ShareScreenshot()
    {
isProcessing = true;
string destination = Path.Combine(Application.persistentDataPath, "screenshotroadies.png");
if (!Application.isEditor)
{
AndroidJavaClass intentClass = new AndroidJavaClass("android.content.Intent");
AndroidJavaObject intentObject = new AndroidJavaObject("android.content.Intent");
intentObject.Call<AndroidJavaObject>("setAction", intentClass.GetStatic<string>("ACTION_SEND"));
AndroidJavaClass uriClass = new AndroidJavaClass("android.net.Uri");
AndroidJavaObject uriObject = uriClass.CallStatic<AndroidJavaObject>("parse", "file://" + destination);
intentObject.Call<AndroidJavaObject>("putExtra", intentClass.GetStatic<string>("EXTRA_STREAM"),
uriObject);
intentObject.Call<AndroidJavaObject>("putExtra", intentClass.GetStatic<string>("EXTRA_TEXT"),
"Can you beat my score?");
intentObject.Call<AndroidJavaObject>("setType", "image/jpeg");
AndroidJavaClass unity = new AndroidJavaClass("com.unity3d.player.UnityPlayer");
AndroidJavaObject currentActivity = unity.GetStatic<AndroidJavaObject>("currentActivity");
AndroidJavaObject chooser = intentClass.CallStatic<AndroidJavaObject>("createChooser",
intentObject, "Share your new score");
currentActivity.Call("startActivity", chooser);
}
isProcessing = false;
}
The above code creates an intent with the send action and puts the screenshot as an extra. If you are familiar with Intents in Android this is probably simple for you to understand just by looking at the code.What we are doing is just initialize an Intent. Setting its action to ACTION_SEND. Creating a Uri object with the path of the screenshot to be shared. Passing the URI object as an Stream extra to the intent and then setting “Can you beat my score?” as a string extra and finally setting the type to image/jpeg. Then we are creating a chooser, this pops up all the available applications that can handle this intent. And we are done, now you have your share screenshot functionality complete in your Android Game. If you have any problem feel free to ask in the comments below. Happy Coding!
