

In the vast landscape of programming languages, Python stands out as a versatile and powerful tool. As Python developers, we often find ourselves working on various projects. Each with its unique set of dependencies and requirements. This is where virtual environments come into play. It offers a way to manage project-specific dependencies and isolate them from the system-wide Python installation.
If you’re a visual learner , here’s the full tutorial video for you

Install Python Extension
Before installing python extension , we assume that you’ve installed python file. If you haven’t installed it, you can go through the video link Install Python.
After the python file is installed , now you need to install python extension in vs code. To install it, follow the steps below:
- Go to the extension of VS Code
Click on the extension icon in vs code as shown in the image below:

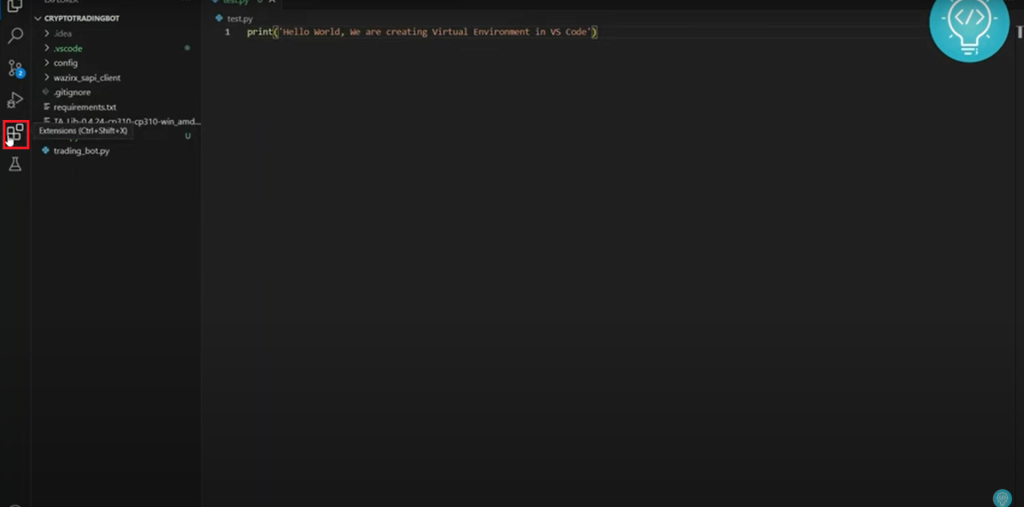
You can also press Ctrl+Shift+X to open the extension in vs code from where you can install different extensions.
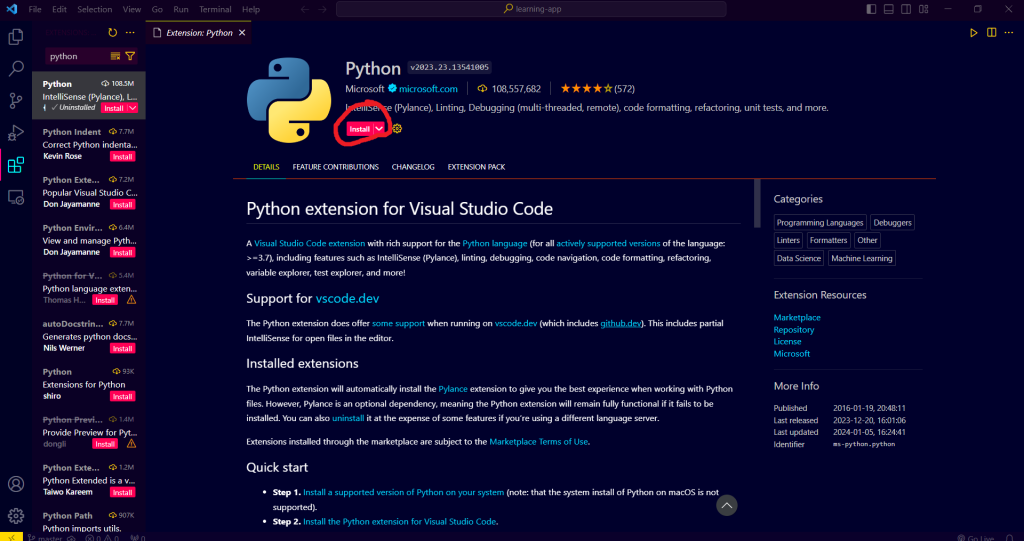
- Install Python Extension
Search for the Python extension in ‘extensions’ of VS Code and install it .

Create Virtual Environment
After the Extension is installed , we now create a virtual environment . We create different virtual environment for different project .
If we don’t create virtual environment for the project, the global python environment will work instead.

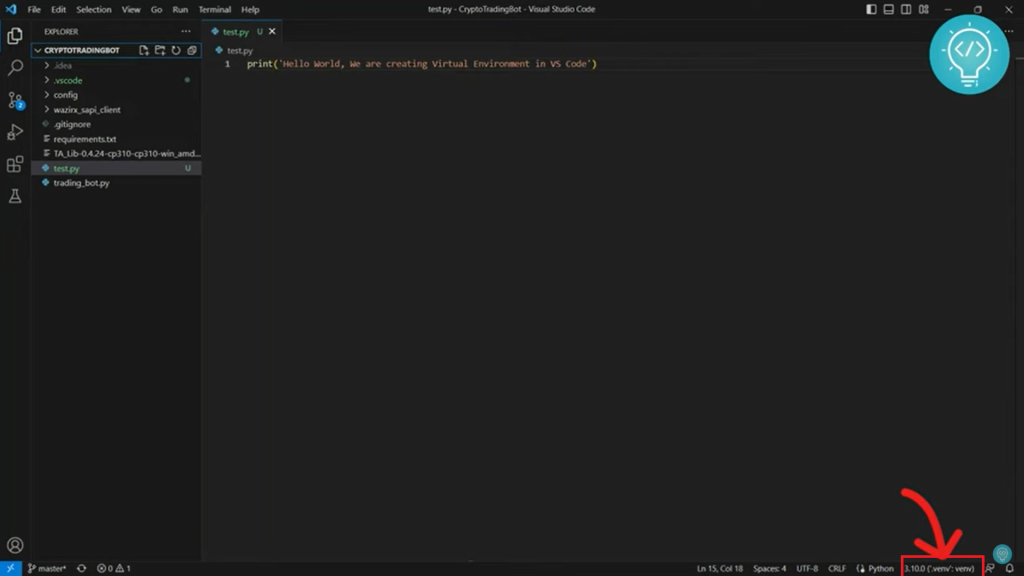
Click on global environment to go to the select interpreter where you see all the python versions that are available to run.

This is the global path or directory where python is installed . But we don’t want to use it rather we want to use virtual environment that is specific to the project.
Now to create virtual environment follow the steps below:
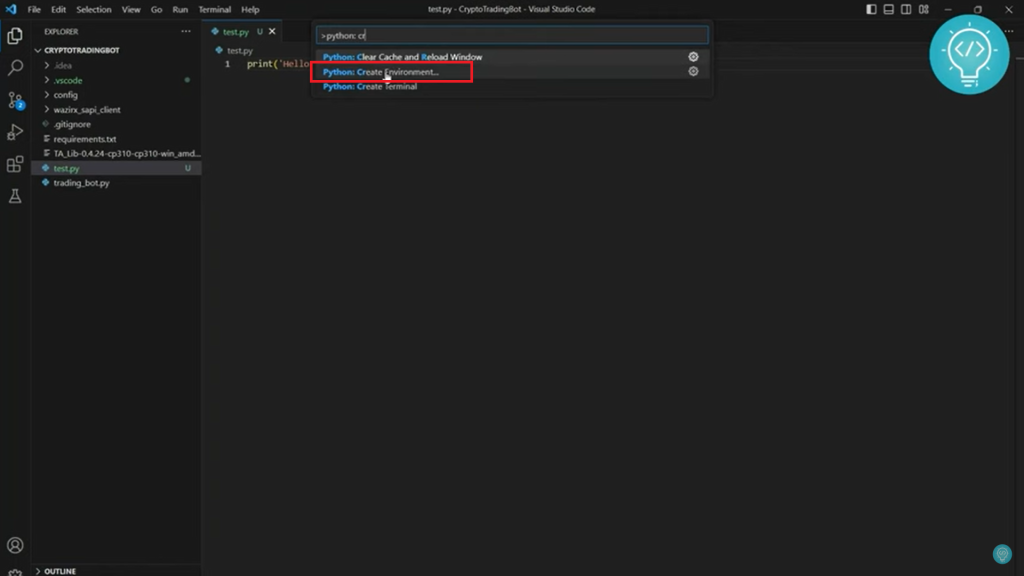
- Go to the command window
Press Ctrl+Shift+P to open the command window in VS Code and search for python create environment as shown in the image below:

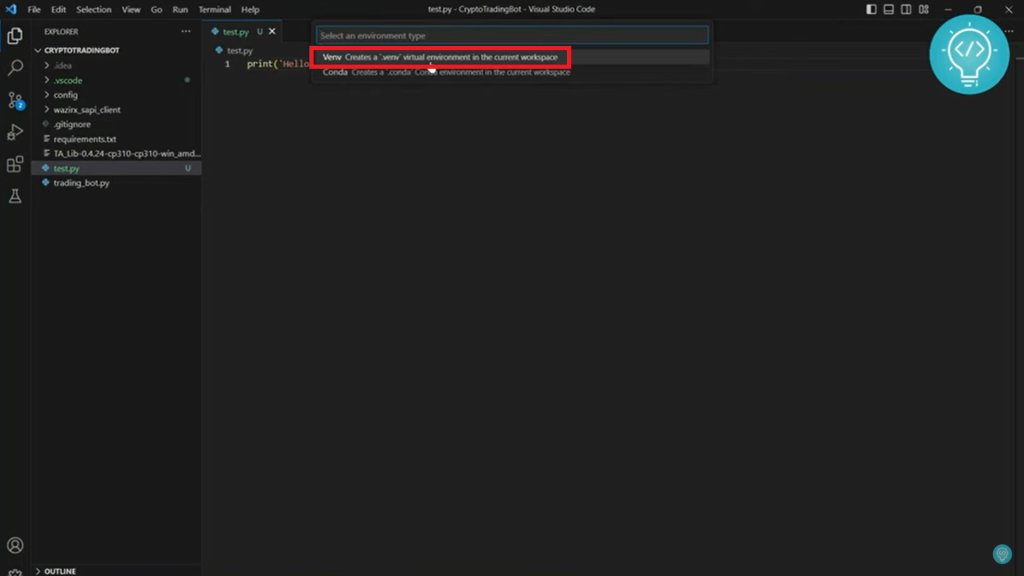
- Choose ‘venv’ for creating virtual environment
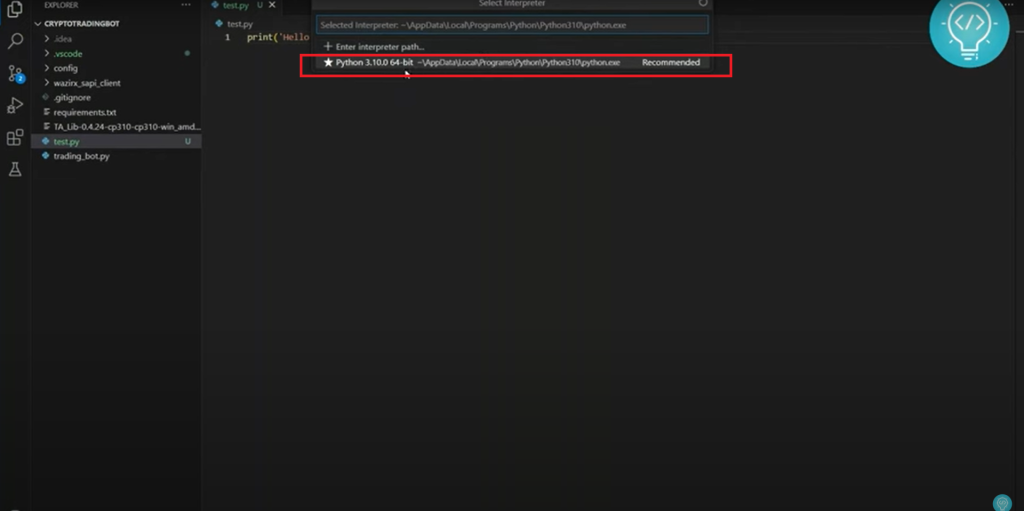
- Select the python which you want to use

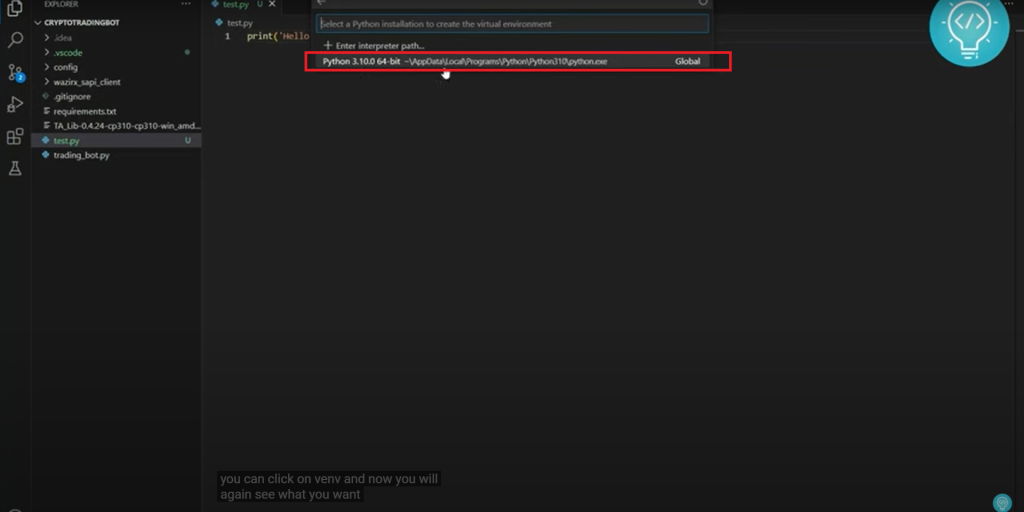
Select the python version you want to work with . In above case, there is only one Global python.
- Select Dependencies to install

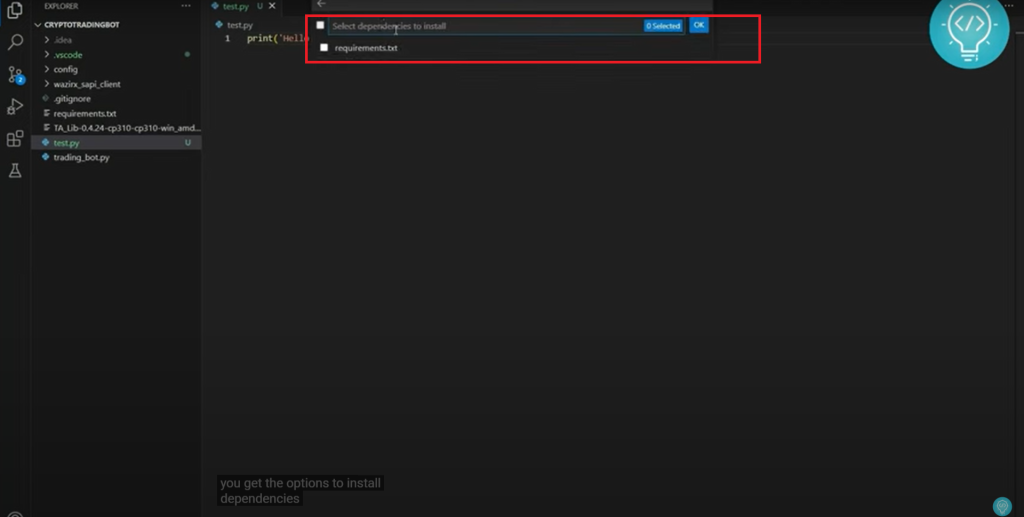
We already have ‘requirements.txt’ file which contain all the dependencies for the project . So we leave it uncheck and click OK.
After this , the virtual environment is created. As you can see in the image below, virtual environment is being created.
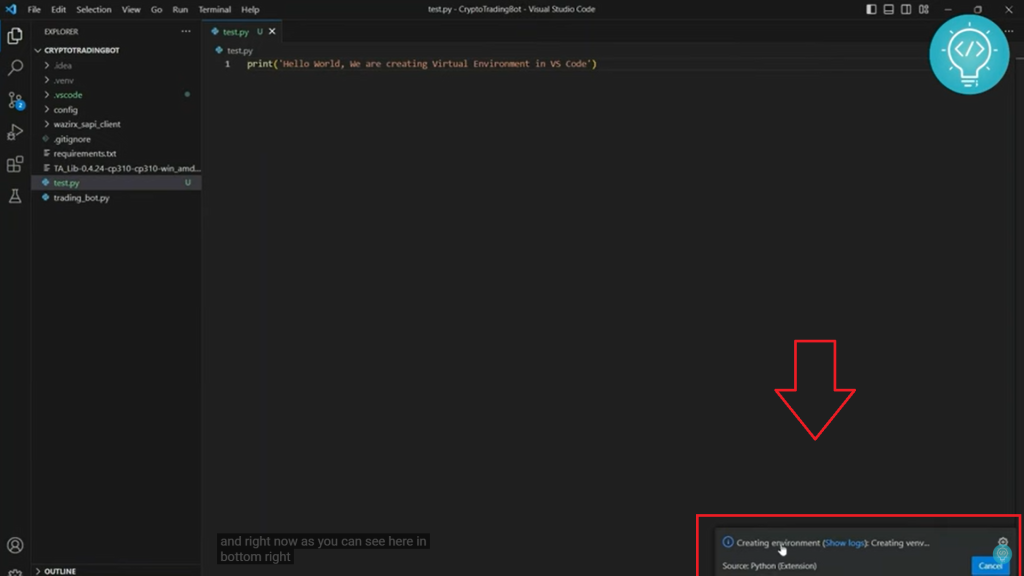
Once it has been created, you’ll get the message to let you know that venv is created.
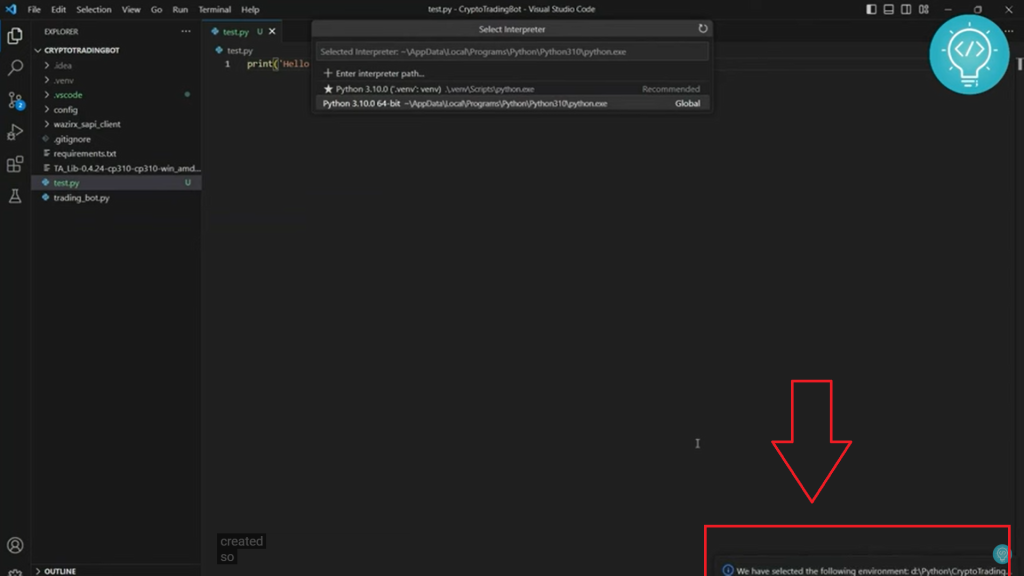
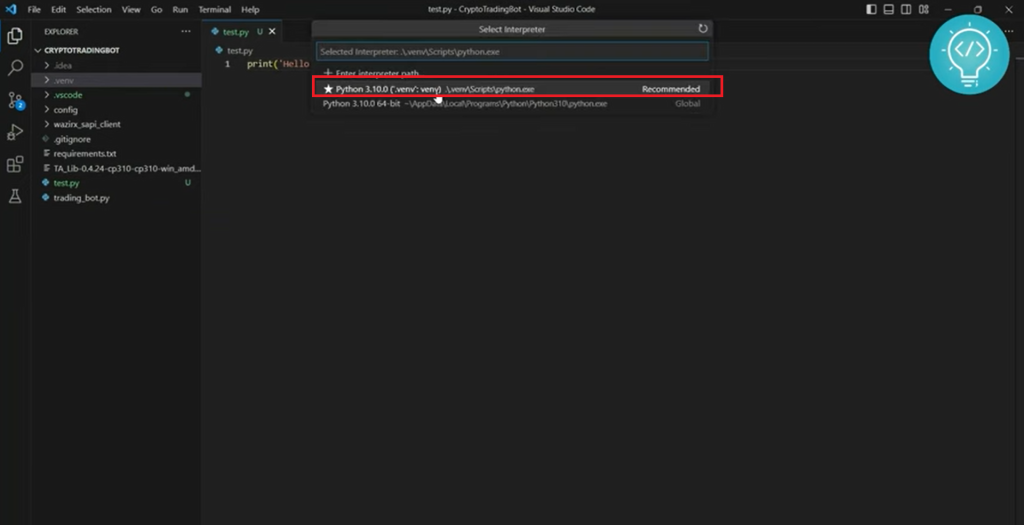
- Select the Virtual Environment for python.
After virtual environment is created, it’ll also create .venv file and it contains the python version of virtual environment that we’ve just created.

- Run the python code
Now that everything is done , run the python code to check if it is working or not. Select the virtual environment for python and run the code .
print('Hello World')You may also like: Change Kernel to Virtual Environment
Conclusion-Create Virtual Enironment for python
In this blog post, we created a virtual environment for python in vs code. At first , we installed python extension assuming that python file is already installed. Then we virtual environment for python and run the python code after selecting the virtual environment. If you’ve any problem while creating virtual environment , let me know in the comments below.