

In the exciting world of web development, creating dynamic and data-driven applications often involves use of the power of databases. If you’re just starting your coding journey, you might be wondering how to seamlessly connect your XAMPP-powered MySQL database with Visual Studio Code, a popular code editor.
We’re in the process of making it easy for beginners to establish a connection between XAMPP’s MySQL database (managed through phpMyAdmin) and Visual Studio Code.
If you are more into videos , here is the full tutorial video for you:
![How to Connect XAMPP(PhpMyAdmin) MySQL Database to Visual Studio [Step By Step]](https://i.ytimg.com/vi/fU9ngotJz1w/hqdefault.jpg)
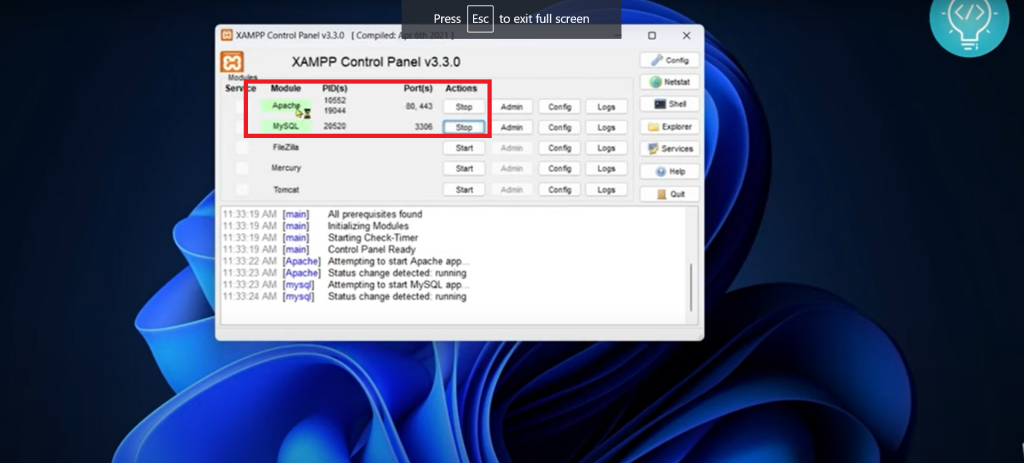
Start Apache And MySQL
Before we begin on connecting our MySQL database to Visual Studio Code, let’s ensure our local server is alive and kicking. we need to open Xampp by typing ‘xampp’ on the start menu on our PC and start Apache server and MySQL database .

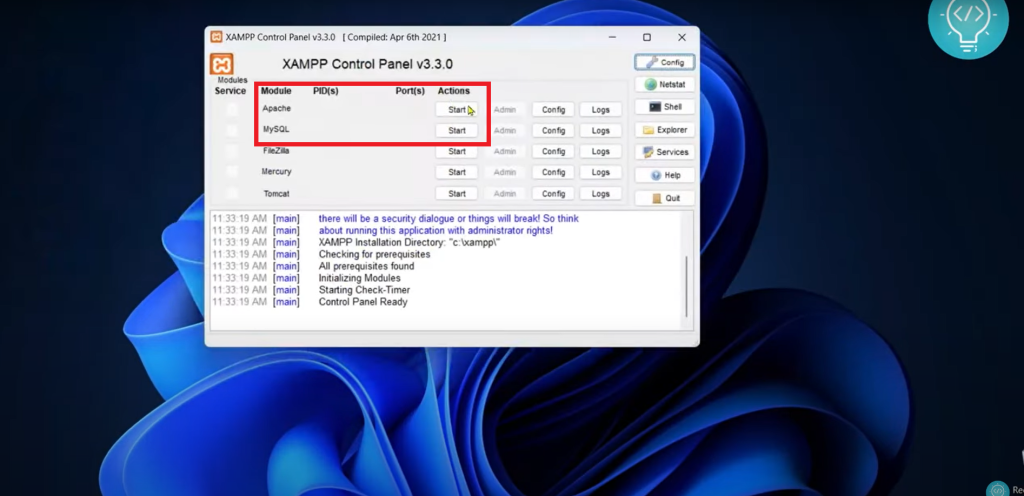
Once it is started you’ll get to see the port number and process id(PIDs) for apache and MySQL in the xampp control panel.

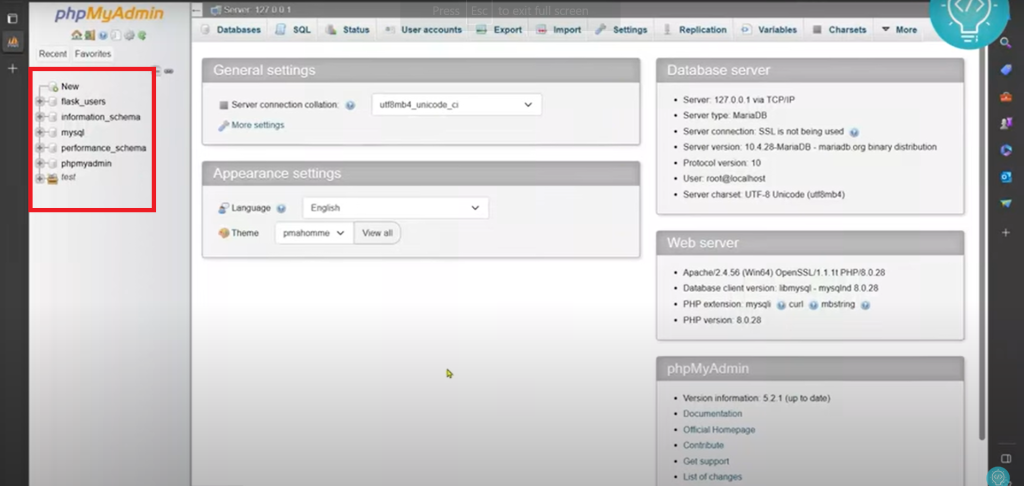
Check Database To Connect To VS Code
Lets check the database we want to connect to the vs code . By connecting the vs code with your database , you’ll ensure the proper connection between your development environment and the database you intend to work with.
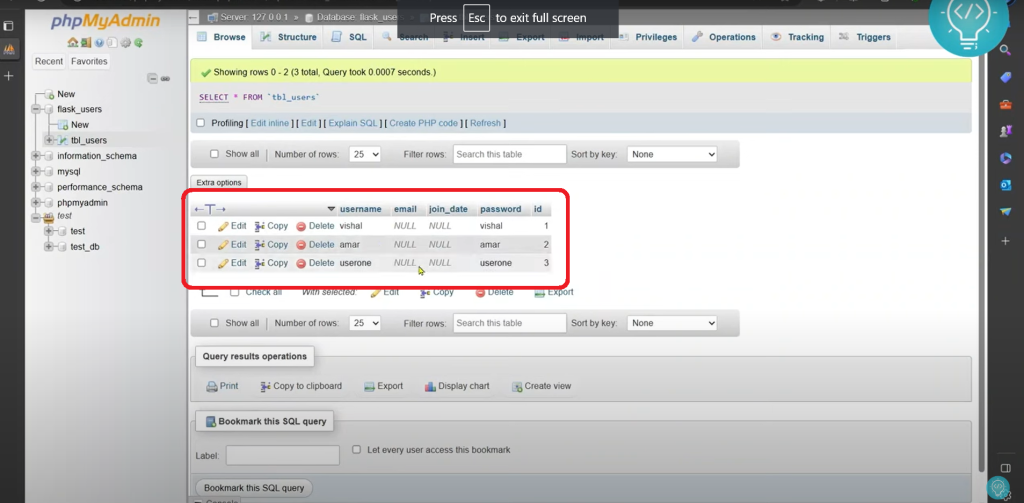
To check the database , you need to type : localhost/phpmyadmin . This will open up a bunch of MySQL databases and there you select the database to work with . The image below shows PhpMyAdmin database on the localhost server.

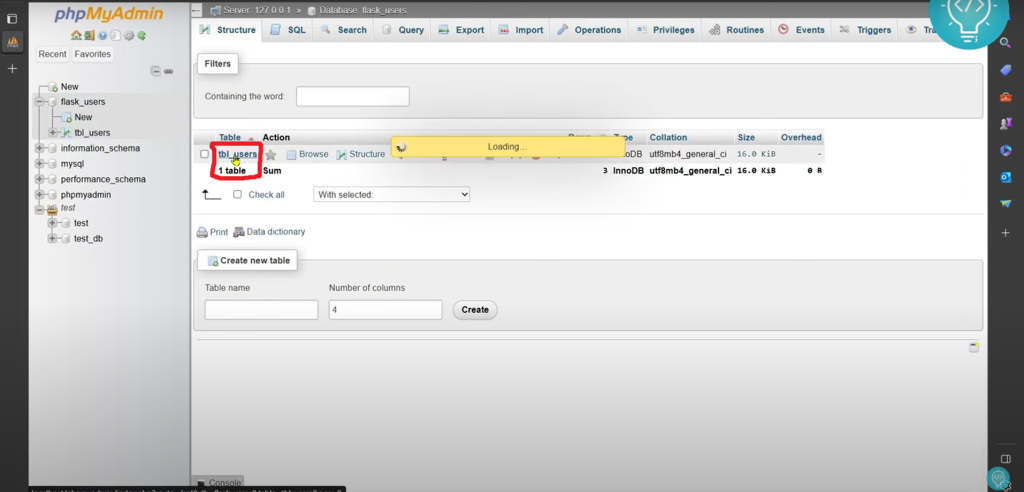
Select Database To Work With
Now, you need to select the database you want to connect with vs code. There may a bunch of databse in PhpMyAdmin , you need to choose the specific database in order to connect it with vs code.
After you choose the database , you’ll get the database user table name as shown in the image below:

You now click on the table name and you’ll get to see all datas available in database as shown in the image :

Connect The Database To VS Code
Further, you need to connect the database which you’ve selected earlier to the vs code in order to get the access of data in vs code.
To do so , follow the steps below:
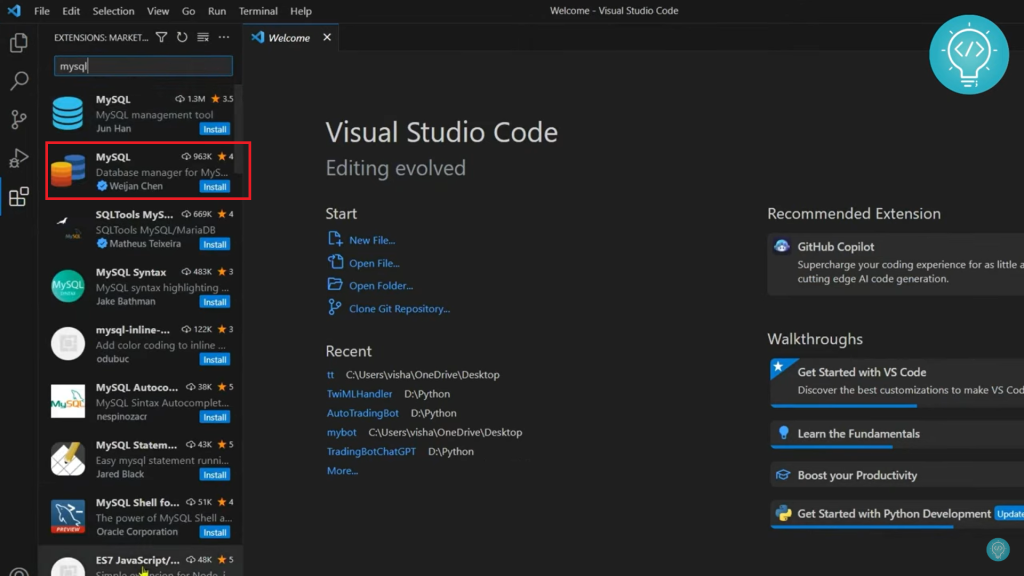
- Open vs code in your computer
- Click on the extension icon


- Search for MySQL in the Extension

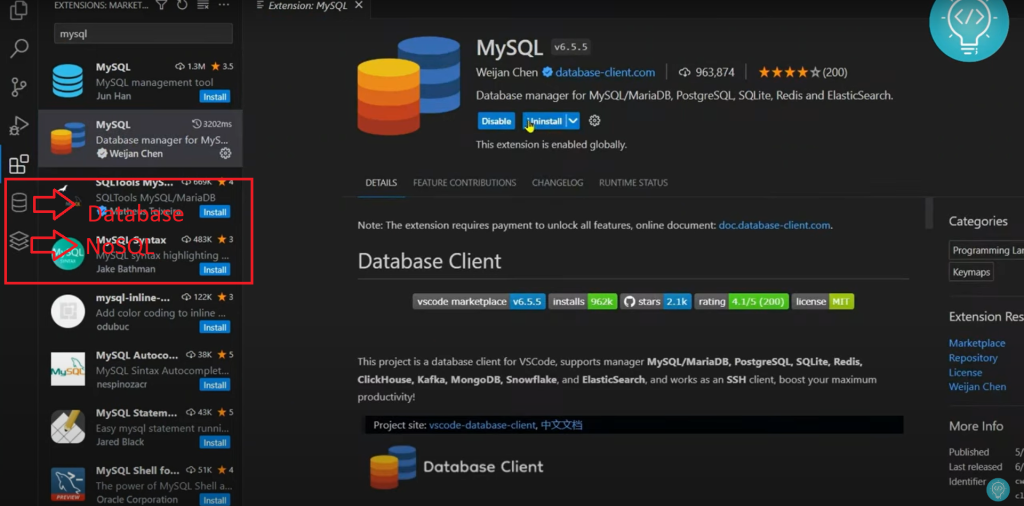
- Select MySQL which is shown in the image i.e. of Weijan Chen and install it .
Once you’ve installed MySQL extension in vs code, you’ll see two icons added that are of database and NoSQL.

Create Connection
Again, click on the database icon and then again click on create connection .
Now you need to give the connection name and also select MySQL as server type. The port number may vary on different devices, you can check it on Xampp control panel.

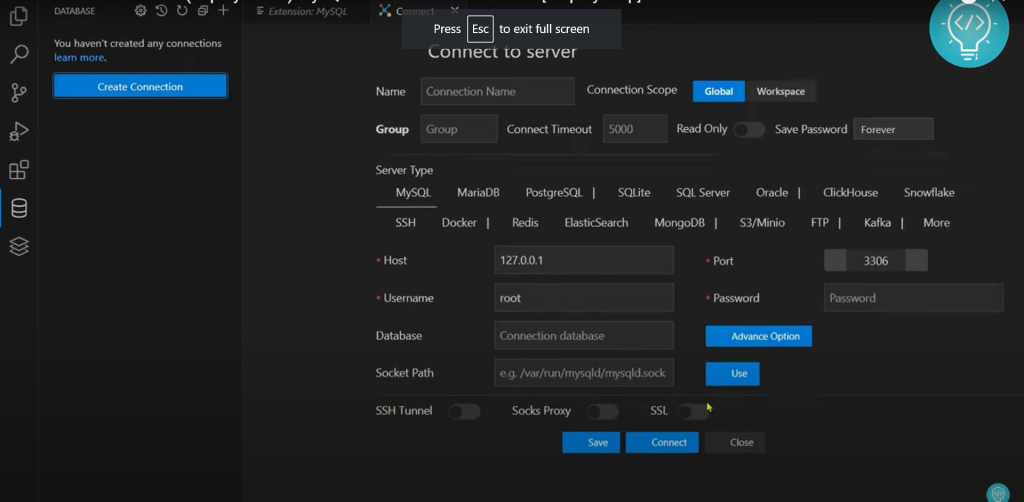
You can add a specific database here , if you don’t add any specific database ,you’ll get to see all the database that root(username) has access on.
Finally after completing all the necessary things, you need to save it . After saving it , you’ll get to see all the database that user has access on as shown in the image below:
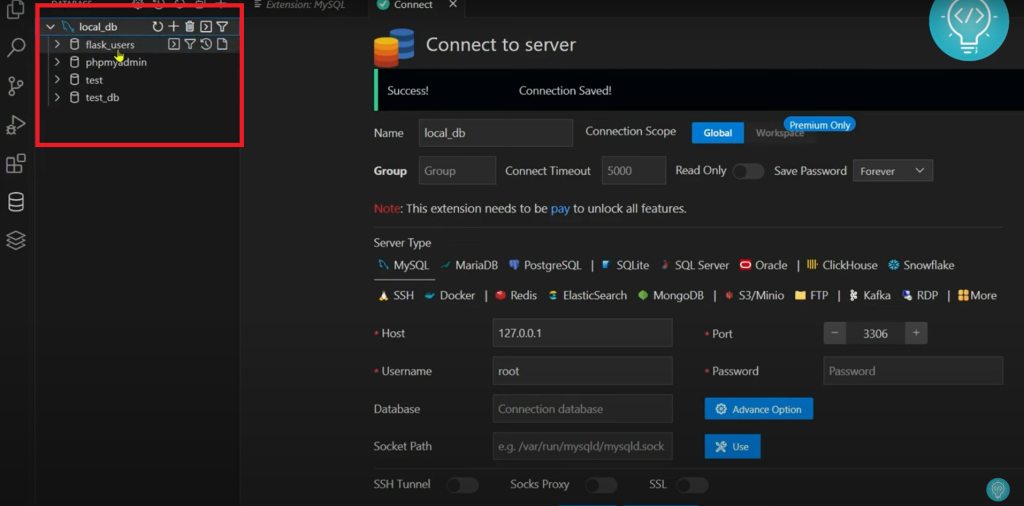
Now, you’ve connected the database to visual studio code, click on the specific database to see the data . To see the data of the database , after clicking on the specific database , click on the tables ,after it , click on the table name . you’ll see all the columns of the table.
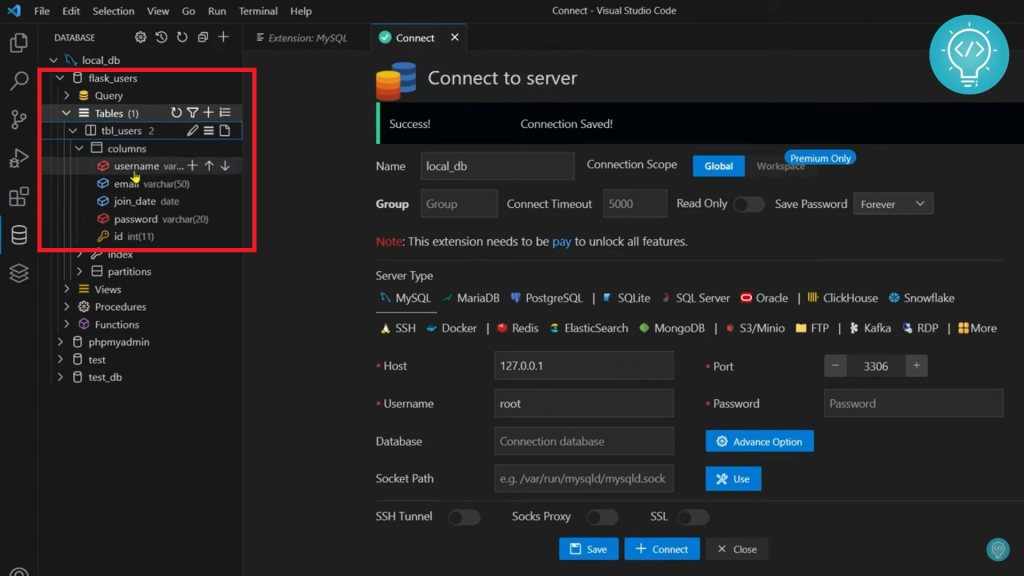
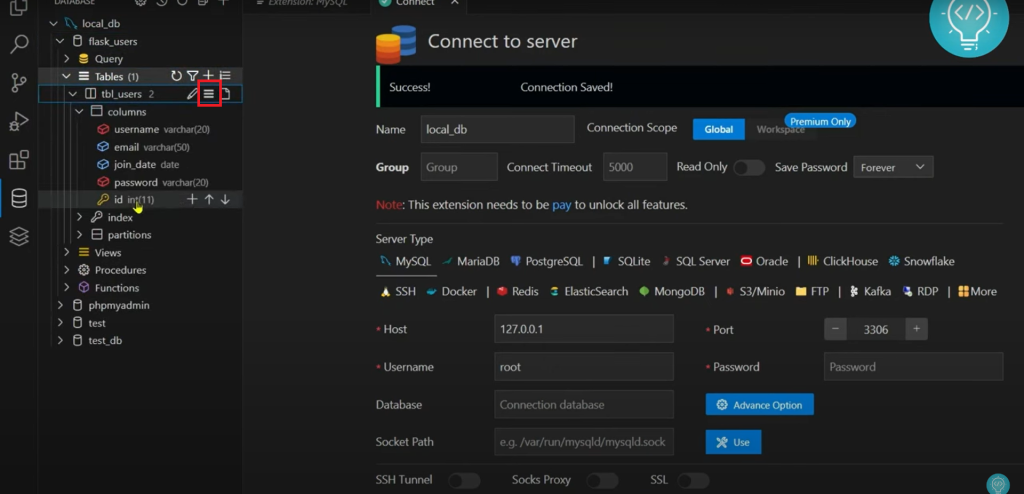
To see all data in the database, click on the icon as shown in the image:

You may also like: MySQL signup database using Xampp
Conclusion- Connect Xampp MySQL To VS Code
In this blog, we connected MySQL Database (PhpMyAdmin) to Visual Studio Code and accessed the data from the database in VS code. First we started apache server and MySQL database in Xampp and we install MySQL extension in VS code and then created the connection and we accessed to the data from database . If you have any problem doing this, let me know in the comment below.